Making The Northsong Rift in RPG Maker Unite - Part 1
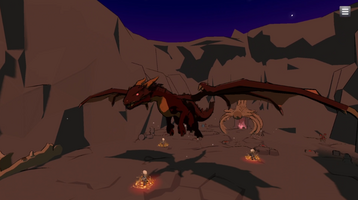
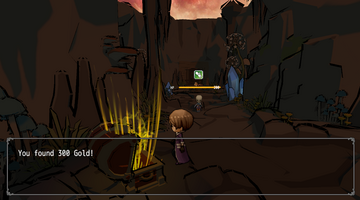
Making The Northsong Rift in RPG Maker Unite - Part 1
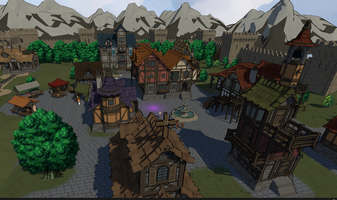
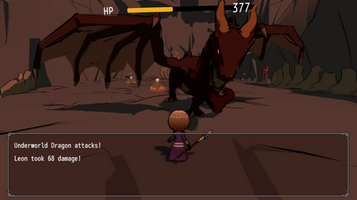
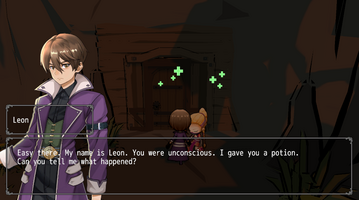
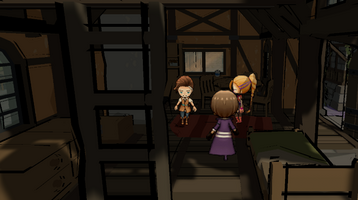
I made 'The Northsong Rift' to really see what I could do with an RPG maker framework sitting on top of the Unity Engine. I am using RMU version 1.1 and Unity LTS 2022.3.36. The game itself is pretty straightforward. It is a linear JRPG with a turn-based battle system. In total, I spent 18 hours over the jam period making the game from start to finish and had a great time overall using RMU.
My goal was to use as much of the built-in RPG Maker systems as possible while leveraging Unity wherever I could add something unique that other RPG Maker engines might not offer. I asked myself, "Where does it make sense to use Unite specifically?" RMU feels very similar to RPG Maker MZ, which is already a great engine with solid stability and support. I wanted to use Unite in ways that MZ couldn’t. For me, that meant partnering Unite with Unity, rather than just running it on top of it.
Overall, Unite provides developers with access to prebuilt systems familiar to RPG Maker workflows within Unity. I've always found RPG Makers fun to work with, so it was great to have the familiarity of the RPG Maker Database in Unity while making this game.
I’ve heard people say Unite should use more of Unity’s systems, and I agree. For instance, I’m not a fan of using UI-based actors on maps or in battle sequences. That said, since RMU is made in Unity, all of Unity’s systems are still accessible. I just had to integrate the ones I wanted—this turned out to be easier than I initially thought. There are countless ways to achieve what I did in The Northsong Rift, and while there are more elegant and polished methods, I needed to meet the jam deadline LOL!
Here is a quick breakdown of whether I used Unity’s built-in systems or RPG Maker Unite’s:
Unite:
- Battle logic and turn-based system
- Save system
- Game UI
- Item system
- Equipment system
- Spells and abilities system
- Actor profiles
- Classes
- Actor/enemy stats and leveling
- Shop system and currency
- Dialogue system
- Variables, switches for triggers and game flow
- Common events
- On-map events
- Title screen and Options
- Artwork
- Sounds
- Effekseer implementation
Unity:
- 3D map-making systems instead of tiles
- Unity Animator with the Sprite renderer, sprite resolver, and sprite libraries instead of character resource and UI-based character rendering
- NavMesh AI Navigation for NPCs instead of move routes
- Timeline for cutscenes and recording gameplay for promos
- 3D physics
Before jumping in, here is a quick list of quality-of-life improvements I wish the RPG Maker Unite editor had (or if any of these exist, I didn’t know how to do it):
- An easy way to sort and organize events, items, commands, etc. in the editor
- Better documentation surrounding the codebase
- Undo feature
- Better window management between using Unity and RPG Maker Unite
- A way to delete unused common events
- A way to paste items and other similar lists from anywhere in the list rather than having to paste it from the top
Setting up a 3D scene
First, I needed to run a Unity scene on top of RMU Scenes. In Unity, running multiple scenes additively is a good practice for most projects. In fact, RMU also uses additive scenes (when the player enters a battle, RMU simply loads the Battle scene on top of the SceneMap scene). With the same concept in mind, I made a little plugin (named CodeEvents) that loads a Unity scene additively. It works much like the new built-in ‘Call Unity Scene’ RMU event command (which will pause or unload the SceneMap scene and load a Unity scene). My plugin simply runs a Unity scene additively but will not pause the SceneMap scene. This means all UI, game state, and RMU Events will still trigger as expected.
Once the player starts a game, I use my addon command in an Autorun RMU event:
After the command runs, the autorun event is removed.
Making an addon do this is very straightforward. Here is a snippet from my addon where it provides this command:
That’s the basics of how to pull off a game like The Northsong Rift. I pass the power on to a new Unity scene that I’ll manipulate as a 3D world using Unity's tools while retaining the RMU systems running at the same time and leveraging RMU’s workflow.
There are a few other pieces to clean up before it works perfectly, though:
My addon (above) also redirects the TryToMoveCharacterClick method to avoid some errors that would result as I will not be using the RMU 2D UI based Actors. In RMU, I set the characters to transparent. In the SceneMap RMU scene, I want to hide the Tilemap Grid and camera. For the Tilemap, I made a quick script named ‘OnStartRemoveGrid’ that checks for the instance of the tilemap and deactivates it. I do this so I won’t hit any race conditions while RMU initiates everything. I might look at an addon for this, but I was crunched for time. In a way, it also shows how you can use Unity to force behavior you want; you don't have to use add-ons. Addons are good to share the code you made with others or incorporate custom RMU event commands.
Hiding the camera without messing up any RMU systems was as easy as setting all the viewports to 0:
Triggering Events
With the new scene launching perfectly, I needed a way to communicate from the 3D scene to RMU. To do this, I created different Unity components. Below is the Variable Setter script.
Here is the script for the Variable Setter component:
As you can see, it is a very small script!
With the Variable Setter separated into its own component, I can add various types of trigger or interaction components to control how RMU variables are updated from the 3D Unity scene. These components are modular and reusable across different types of gameobjects, such as chests, doors, NPCs, etc.
Here is the script for the On Interact Event component:
For some gameobjects, I add the On Interact Event component, which requires the player to be within range and press the appropriate key to interact with the Variable Setter. For other game objects, I might add the On Trigger Enter Event component, which automatically calls the interact method on the Variable Setter when the player comes within range.
All my components leverage Unity Events. This is how the On Interact Event and On Trigger Enter Event components calls the Variable Setter’s Interact method, which updates the variable's value in RMU. When a Unity Event is Invoked, it will call any methods that I have assigned to that Unity Event within the inspector.
Notice how the On Interaction Event component is linked to the Variable Setter. This component also uses the pre-set-up RMU player input actions asset (from Unity’s input package) so that if you ever wanted to alter the player controls, you can do that in one location for the entire project.
The Unity Events allow me to call any methods from any gameobject in the scene via the inspector without additional coding. This On Interact event is going to call the Variable Setter's Interact Method:
I talk more about Unity Events in a devlog that I made for a game called The Hidden Axis. You can find it here: Making of The Hidden Axis (6 hours of dev time) - The Hidden Axis by Lochraleon.
The Interact Method on the Variable Setter will use the RPG Maker Unite API (specifically the DataManager.Self().GetRuntimeSaveModel().variables) as seen in my Variable Setter script above to set the value of any variable I select from the dropdown menu in the inspector. For the dropdown list of variables to appear in the inspector of my Unity component, I made a custom inspector that reads the RMU JSON file containing all the variables and their names. When the variable is set via the 3D scene, an autorun RMU event that was set up in the traditional RPG Maker workflow (see below) will run.
The RPG Maker event has two pages. The first page autoruns when the variable equals 1 and sets the variable to 2 after it displays the dialogue. The second page is active if the variable equals 2 and blocks that dialogue in page 1 from running again.
RMU editor Page 1 of the Dialogue Trigger Action:
I created simple components to check the value of RMU variables and switches so that the 3D world can also react dynamically to variable/switch changes. In the screenshot below, you can see the Guard NPC. This NPC is using a Variable Checker component to monitor when variable '1 - Story Variable' is equal to 2. If that variable equals 2, the NPC should use Unity’s Navigation AI to follow the player and enable the Unity Box Collider component, which will trigger the On Trigger Enter component to update the Story Variable to 3 via Variable Setter once he is in range of the player. If the variable is greater than 2 the box collider will be disabled to avoid the variable being reset to 2.
I didn't want to check the value of every variable every frame so I made the Variable Checker triggered via an RMU Event Command provided through my addon. This gave me full control of when the 3D scene would update based on the RPG Maker Events.
Here is the script for the Variable Checker. You can see where the component subscribes to the onVariableCheck command in the OnEnable method to run the CheckVariable code:
Using variables and switches to control the game progress in both RMU and the 3D scene means RMU’s save system works like a charm and saves game progress as expected.
Here a short gif of the results of the above examples:
Cutscenes
Although you can freeze the player input and make sequences with the approach above (kind of like a cutscene made in RPG Maker), for my cutscenes, I leveraged the Unity Timeline System. Timeline allows you to make cutscenes as if you were making a video in video editing software. As a bonus, Timeline also allows you to record video in formats like mp4, perfect for making promo videos. When Timeline video recording is enabled, it actually records every frame consistently regardless of the game framerate, resulting in perfectly smooth game footage even on a potato PC. I have my Timeline Playable Director on an inactive gameobject set to ‘Play on Awake’. Using the Variable Checker or a Switch Checker, I can activate the object with no extra coding via Unity Events so the cutscene plays based on RPG Maker variables or switches. Timeline can be used to control multiple cameras, so you can get very cool cutscenes with no coding, like the Dragon's entrance in The Northsong Rift.
Opening Cutscene in Timeline:
Dragon Entrance Cutscene in Timeline:
The Player
For the Player character and camera in my additive 3D scene, I simply parented a camera to the Player gameobject. I used the standard Unity Character Controller component and a Player Controller component to control the player. I also parented another gameobject to the Player called Visuals, which consisted of the regular Animator, SpriteRenderer, SpriteLibrary, and Sprite Resolver components. I made Unity animations created from the Sprite Resolver component (not Renderer), so I am able to use the same animator and animations and swap different sprites (even at runtime).
In Closing Devlog Part 1
Let me know if you are interested in another devlog where I'll dive into how I integrated the RPG Maker battle system with the 3D Unity scene .
:) If there is enough interest, I may find time to release a package with my components and custom inspectors along with my addon.
In the meantime, check out The Northsong Rift! If you have time, jump on the page and rate it! Feel free to reach out if you have questions :)
Thanks for reading!
Lochraleon
Files
Get The Northsong Rift
The Northsong Rift
When our world is torn asunder, we are reminded that our reality is but a thin veil over the abyss.
| Status | Released |
| Author | Lochraleon |
| Genre | Role Playing |
| Tags | 3D, RPG Maker, Unity |
| Languages | English |
Comments
Log in with itch.io to leave a comment.
Hey Loch, would you be open to sharing the CodeEvents plugin? This is the kind of thing I was really hoping Unite could be used for when it was first announced. Thanks!
Hi! I have been meaning to clean up the CodeEvents plugin and release one people could just drop in the Unite addon folder. Maybe with my variable checker and setter custom editors also (so you can select the variables by name with a drop down menu in a regular unity scene). I am out of town at the moment though, I'll see if I can at least post the rest of the Northsong Rift's CodeEvents code (the messy version) when I get back in a couple of days. In the meantime feel free to ask questions. Also download and checkout the game if you haven't already :) cheers!
Hey, just wanted to check back in about this.
Hi :) Sorry I got busy! I didn't get a chance to clean up my CodeEvents plugin yet to work more generically, or package it up as a unitypackage yet... but this is the CodeEvents script for the addon I used in The Northsong Rift as is: https://drive.google.com/file/d/1pEgUZGOAIMxCNpeX4S3nfx4gno0kxxyP/view?usp=sharing
Thanks! I'll be sure to let you know if I do anything with it.
Man this is awesome! Reddit brought me here! Keep up the amazing work! :D
Thanks so much, I am still working on part 2. I got caught up with a few things but I am hoping it's ready within 2 weeks at the most. :)
Really cool stuff man. Cool to see how you pulled this off.
Thanks Padr!!